Sunday, October 23, 2011

More inside work


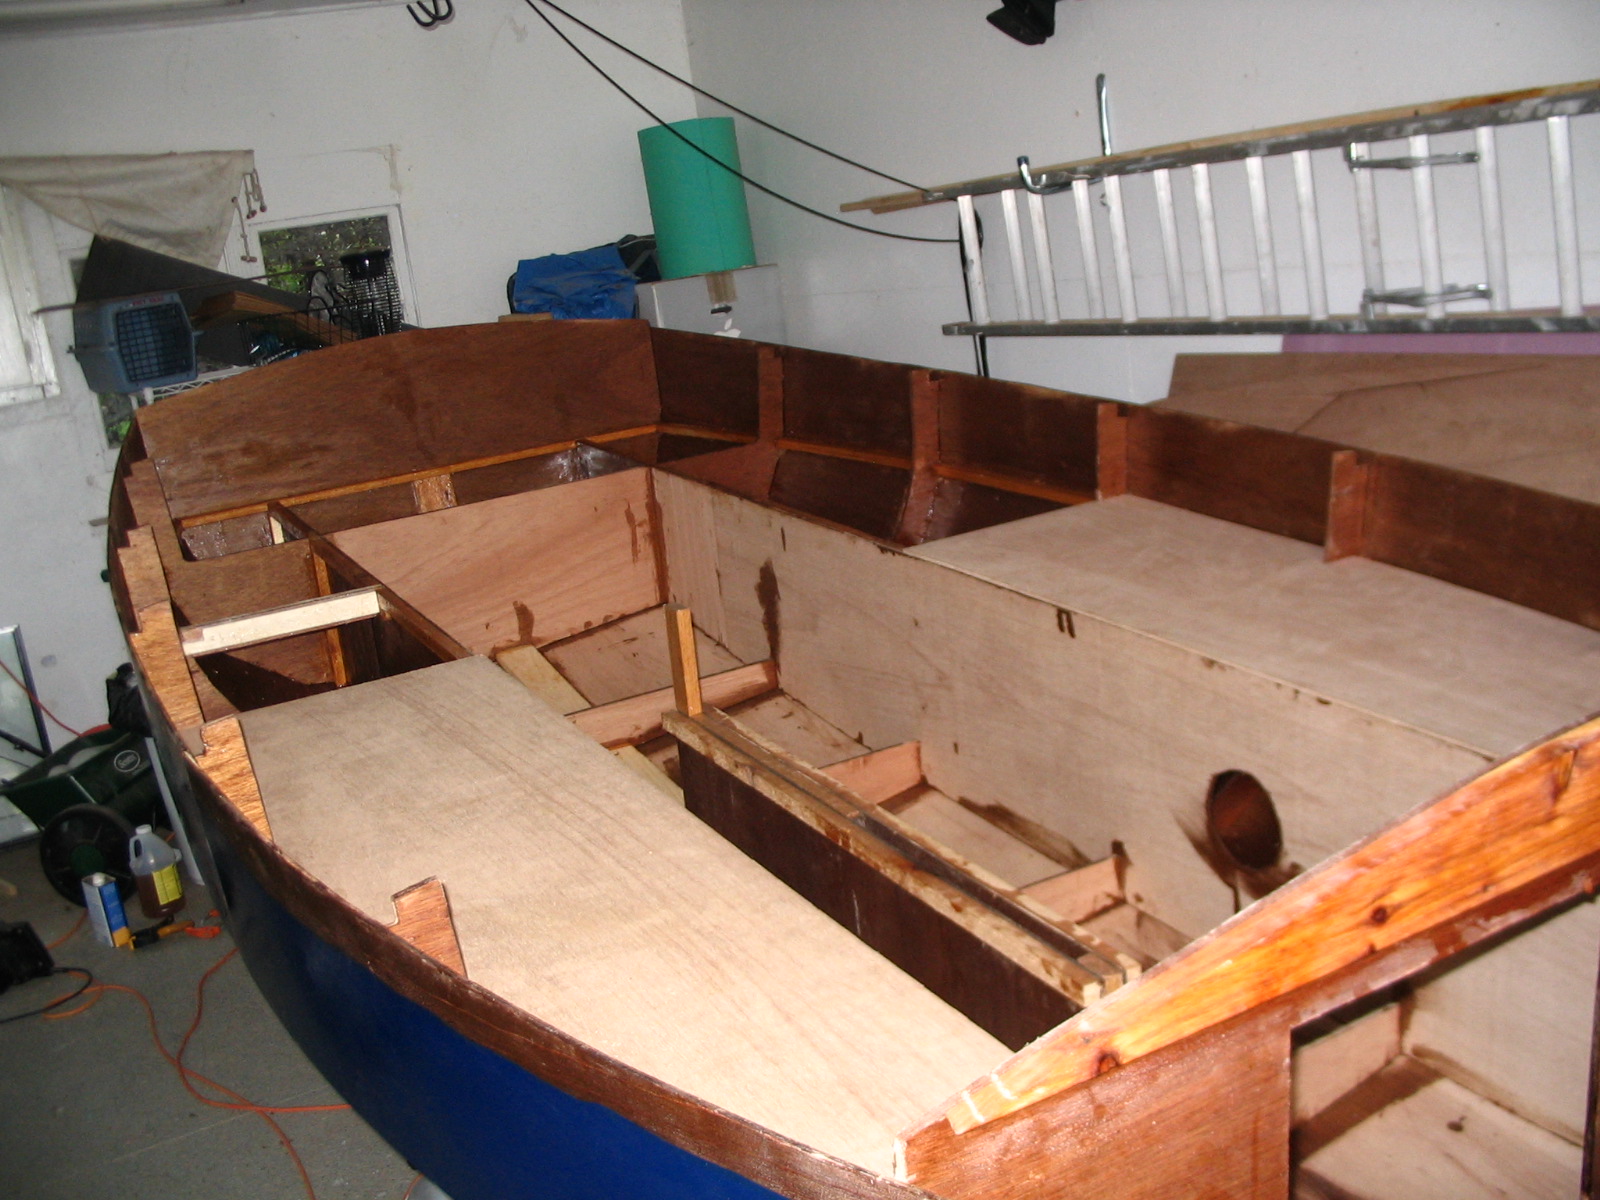
In the past two weeks I have been working away, trying to do as much as possible before serious cold sets in.  I cut, fit and glued side deck knees, seen on the left, which are awaiting 1x2 boards (already scarf-joined to just over 11 feet) to be screwed on their narrow faces.  The knees, inwales and boards will provide the base for 6-inch-wide side decks.

Then I made sure I do whatever needs to be done before the foredeck goes on.  It included extra beams between the two fore bulkheads, and reinforcements for the mast hole and for the halyard and snotter cleats (I'll explain later).  These are in the second photo, which shows the fore-end.

I also needed to put on a mast step for the fore (main) mast.  I had to calculate its placement from the rake angle of the mast (trigonometry again).  I glued two pieces of lumber on each side of the keel, and then laminated two square pieces of plywood and cut a two-inch round hole in them.  I finally screwed and glued all together (third photo).  I did the same for the mizzen mast, just next to the aft end of the centerboard case.

Then I laminated two oblong pieces of plywood (3/8 and 1/4 inch thick, or 9 and 6 mm) to make a rowing thwart, which will also be the mizzen mast partner.  I cut a 2 1/4 inch hole in the thwart and attached it to the benches in the right position (again I had to place the mast partner and mast step holes so the rake of the mast is correct).  The thwart is also supported by an oak board that protrudes from the centerboard case.  That's in the final picture.
 
I also glued together two pieces of oak molding of different widths to make rails for the sliding door of the fore locker.  These will have to be put on before the foredeck goes on, but the bottom one will be finally glued in place after all the surfaces are finished. 

Finally, I cut all the pieces of centerboard and rudder.  They are ready to laminate and finish (sometime in the winter).

That's a lot of work, and good work if I may say so myself.  Why does it feel like I'm not making progress?  I suppose because of unrealistic expectations.

For more progress, keep checking 176inches.

boatbuilder


Saturday, October 8, 2011

Back from Europe

I was away for two weeks (and three weekends) on vacation in England and Ireland, visiting friends.  We spent most of the time in London, with a four-day trip to Ireland where our friends are building a house out of the ruins of a family cottage and cow-shed, on a lonely windswept hillside with stunning views, and overight trips to Cambridge and Brighton.  We visited my alma mater (Sussex University), met some of my college friends from 32 years ago, hiked on the Sussex downs, walked long distances, went on a punting trip on the river Cam, attended services at King's College, Cambridge chapel (with the men's and boys' choir filling the Gothic space with angelic music), visited museums, saw four plays, ate wonderful food and sampled excellent beer.  It can be argued that all that is not the subject of this blog, but it is relevant because it delayed the boatbuilding, and in any case it falls under the category of "other follies."  Our second week there coincided with a record heat wave (for England), up to the mid-80s (or almost 30 Celsius).  That was nice except that it was totally unexpected (people had been grumbling that the UK hadn't had a summer at all this year) and we hadn't packed enough warm weather clothes.  On a Saturday in and around Brighton, on the south coast, the beaches were mobbed and the sea was full of beautiful sailboats.

Which brings us to the main subject of the blog.  Since coming back I reinforced the undersides of the bench tops with extra strips of plywood, covered the insides of the benches with a second coat of epoxy, and waterproofed (hopefully) the buoyancy compartments with epoxy fillets along the seams.  Then I glued and nailed the bench tops in place.  They still need to be finished, and the doors reinforced, fitted and finished.  Finally, I glued and screwed the inwales in place.  Nothing worth taking a picture of yet, but things are steadily moving along.  The next big step will be side deck knees and the side- and fore-decking.  Somehow I doubt I will finish before the cold weather sets in.

So, despite the occasional slow stretch, keep reading 176inches!

boatbuilder

Monday, September 12, 2011

Benches and lockers


The past week I continued to work on the inside of the boat: seat tops and locker doors.  On the left you can see all the pieces (10 of them) all fitted quite precisely: four long seat tops, three hinged flip-up locker doors, and three backing pieces (between the doors and the sheer strakes and transom).  In the next photo you can see two of the brass hinges laid on for fitting.  There is still some work to do before putting on the hinges: another coat of epoxy on the insides of the benches, two coats on the undersides of the seats, and reinforcements glued on the undersides of the locker doors.  I just didn't feel like messing with epoxy for a change and concentrated on sawing.

I also cut the sliding door for the fore locker (see photo), which will be between the fore bulkheads.  It will slide on wooden runners set horizontally into the main bulkhead.

Finally, I designed, drew and cut the three distinct pieces of the rudder: the piece attached to the tiller and transom, the pivoting blade that will be in the water, and the jaws that hold them together.  It was very tricky (at least to me, with this being my first effort at boat design) to make sure the moving parts  pivot against each other, and I arrived at it without copying anybody else's specific design.  I will need to cut another identical set to laminate all together.  I will also have to decide whether to use lead or a bungee cord to keep natural buoyancy from flipping up the pivoting blade.  I am inclined to give dealing with molten lead a pass!

As for what comes next, you read it before: more smelly, messy epoxy coatings and gluings.

Until then,  I remain your friend
boatbuilder

Sunday, September 4, 2011

Seats and cabinetry


The last couple of weeks have involved putting the curves on forward bulkheads and transom, and working on the inside of the boat, something that is very picky and borders on cabinetry.  I am building three flip-up doors into the seat tops, which means putting in supports and framing, joints etc.  After cutting all the pieces from aspen (door frames), plywood (reinforcements) and pine (the rest), putting in all the notches, etc., I put one coat of epoxy on the the entire inside of the boat, except the bottom (too hard to reach for now, plus there's no hurry) and the outsides of the seat risers (also hard to reach, and I need to do a careful job since they will be visible and left unpainted, with epoxy and varnish).  In the process I had one more episode of the epoxy overheating and solidifying too early (yesterday was a very hot day).  So now I am keeping the epoxy containers in the fridge, at least part of the time.

I then cut seat tops (see above for forward half), except where the doors will go, and notched them for the frames.  This is harder than it sounds, since the frames are not exactly square.  I also made my first measuring and cutting mistake, which left a gap about 10 mm wide (about 3/8 inch) over part of one seat stringer, on the sheer side.  Not wanting to waste plywood, and given that I don't have much to spare, I will fill it with a thin sliver of ply and epoxy fillet.

Today I glued all the framing pieces (see detail from aft seat/storage area--the crosspiece is not in yet).  Next the inwales will be glued in.  Then the seat tops will be epoxied on the inside, and reinforced where needed.  After a second coat of epoxy on the inside of the seats, the tops will go on, including hinging the doors.  The next step will be braces for the side decks. 

Cheers,

boatbuilder


Wednesday, August 24, 2011

Flippin' pix

As promised, here are the pictures of the boat flipping, in order.  You can admire the glossy finish, or the lightness of the hull, or the beautiful lines (if I may say so myself).  Or not.

Since then I haven't done much on the boat, but I spent a wonderful weekend in Cleveland (yes, you read that right) with my wife and daughters.  It the past few nights I mostly cut the curves into the fore bulkheads, and it's so hard and awkward that I wish I had done it earlier, but you live and learn.  I still have to sand the tops smooth.  I also fit and trimmed the inwales--once again one of them broke, at a knotty spot.  I glued it back together and cut a few shallow kerfs to prevent it happening again.  They are now ready to glue in place.  I hope to make a lot of progress in the next two weeks, while my wife goes to see her mother again (hurricane Irene permitting).

Meanwhile, keep reading 176inches (which, with the bow trim--or false stem as some call it--and curved transom, will be closer to 179 inches in the end).

boatbuilder


Sunday, August 14, 2011

Flippin'

This past week I gave the hull a couple of coats of paint, which made it very shiny and made the small flaws stand out even more, but as I said before I don't care.  Finally, on Sunday afternoon I marshaled together four other guys (thanks, Carl, Chris, Gregg, and Paul!) and we flipped it over (right side up) from the building frame to the trailer.  Before doing that I removed the nails that secured the boat to the frame, and rigged together a safety system of ropes running through eyebolts screwed into the garage walls.  Here I am with the rope system in the "before" picture.  You can see everything being reflected in the super-glossy paint. 

It turned out to be utterly unnecessary.  Two people can lift the boat hull with great ease, and using the ropes would have meant doing the flipping inside the garage.  Seeing that the boat's beam is almost six feet, that would have been awkward (it would have hit the garage door opener overhead).  The guys therefore decided on the spot to ignore the ropes, lift the hull, walk it outside and flip it manually.  It took almost no time.  It was a revelation to finally see the inside, after only a few glimpses while clambering underneath.  Ah yes, and it became clear that the trailer is too small.  Designed for a personal water craft, the trailer is fine for my little 11' 6" (3.26 meter) first boat, the good ship Robin.  But Aerie is 15 feet long, and the trailer, while fine as a building platform, will not be safe enough on the road.  You can see two "after" photos, inside and out.  By the way, the strip at the sheer was left unpainted to receive the 2-inch-wide oak rubrails.  Next I will be giving the inside a coat of epoxy, gluing in the inwales, filleting some seams, and putting in the bench tops.

So, I hear you say, where are the "during" pictures?  Well, my camera ran out of juice at the wrong time.  Fortunately, my daughter Georgia is visiting from San Francisco, and she took some great photos with her camera.  Unfortunately, she didn't bring the little USB cable so I can't upload them.  We'll have to wait until she goes back and e-mails the photos.  So, as usual,

keep checking 176inches!

boatbuilder

Sunday, August 7, 2011

Epoxy and paint

 The past week has been devoted to filling, puttying,  sanding and coating with epoxy.  As I've already confessed, sanding is my least favorite activity, so a purist would be able to look around and find many small flaws.  I don't care.  After many passes of setting nails, filling with filleting compound, sanding, more filling, more sanding, etc., then some final spot touching up with wood putty, then more sanding, came the time to call a halt to it and coat with epoxy.

Word to the wise: working with filleting compound (epoxy mixed with wood flour) is a pain.  It starts getting stiff very soon, and requires a lot of sanding afterwords.  If it is allowed to cure for more than 48 hours, it's very hard to sand level to the wood.  On the other hand, it's extremely strong and adds to the structural integrity of the boat.  The scarfed joints of the strakes, 8 in total, benefited a lot from filleting compound, since they were far from perfect to begin with.  With a bit of wood putty at the end they will be completely hidden once the paint goes on.

So here is the boat after the second and final coat of epoxy, which has brought out the beauty of the wood and gleams blindingly.  Too bad it will be covered with paint, but it gives an idea of what the inside parts (benches, lockers, thwart, floor, splash guards, CB case), which will be left natural, will look like.

This coming week I will give the hull two coats of paint, after some light sanding.  Then I will flip the boat right-side-up onto its trailer (which I hope will be big enough) so I can work on the inside.  The flipping will be done with a few friends and neighbors, perhaps with the aid of a canoe hoist that I attached to the ceiling of the garage years ago.  I promised to pay them in beer.

So check 176inches in a week or so for more pictures and stuff.

boatbuilder