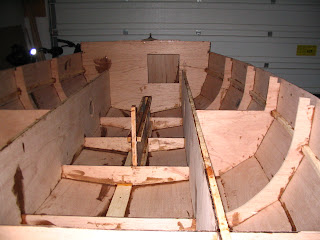
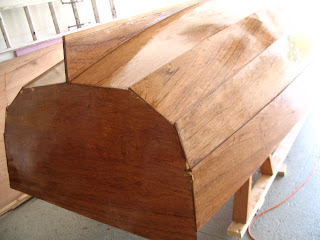
This past week I gave the hull a couple of coats of paint, which made it very shiny and made the small flaws stand out even more, but as I said before I don't care. Finally, on Sunday afternoon I marshaled together four other guys (thanks, Carl, Chris, Gregg, and Paul!) and we flipped it over (right side up) from the building frame to the trailer. Before doing that I removed the nails that secured the boat to the frame, and rigged together a safety system of ropes running through eyebolts screwed into the garage walls. Here I am with the rope system in the "before" picture. You can see everything being reflected in the super-glossy paint.

It turned out to be utterly unnecessary. Two people can lift the boat hull with great ease, and using the ropes would have meant doing the flipping inside the garage. Seeing that the boat's beam is almost six feet, that would have been awkward (it would have hit the garage door opener overhead). The guys therefore decided on the spot to ignore the ropes, lift the hull, walk it outside and flip it manually. It took almost no time. It was a revelation to finally see the inside, after only a few glimpses while clambering underneath. Ah yes, and it became clear that the trailer is too small. Designed for a personal water craft, the trailer is fine for my little 11' 6" (3.26 meter) first boat, the good ship
Robin. But
Aerie is 15 feet long, and the trailer, while fine as a building platform, will not be safe enough on the road. You can see two "after" photos, inside and out. By the way, the strip at the sheer was left unpainted to receive the 2-inch-wide oak rubrails. Next I will be giving the inside a coat of epoxy, gluing in the inwales, filleting some seams, and putting in the bench tops.
So, I hear you say, where are the "during" pictures? Well, my camera ran out of juice at the wrong time. Fortunately, my daughter Georgia is visiting from San Francisco, and she took some great photos with her camera. Unfortunately, she didn't bring the little USB cable so I can't upload them. We'll have to wait until she goes back and e-mails the photos. So, as usual,
keep checking 176inches!
boatbuilder
 As promised, here are the pictures of the boat flipping, in order. You can admire the glossy finish, or the lightness of the hull, or the beautiful lines (if I may say so myself). Or not.
 Since then I haven't done much on the boat, but I spent a wonderful weekend in Cleveland (yes, you read that right) with my wife and daughters. It the past few nights I mostly cut the curves into the fore bulkheads, and it's so hard and awkward that I wish I had done it earlier, but you live and learn. I still have to sand the tops smooth. I also fit and trimmed the inwales--once again one of them broke, at a knotty spot. I glued it back together and cut a few shallow kerfs to prevent it happening again. They are now ready to glue in place. I hope to make a lot of progress in the next two weeks, while my wife goes to see her mother again (hurricane Irene permitting).


